The 'SIM not supported' error is a problem you may run into when using your iPhone and which is likely the reason you have landed on this page. It is a frustrating experience given that it prevents you from using your SIM card for phone calls and accessing other carrier-related essential services. The error occurs when your phone cannot read the inserted SIM card although the actual causes of this can be diverse.
We will talk about the causes in a bit. The good news though is that it is not an insurmountable problem. There are steps you can take to troubleshoot and fix it. In this article, we explore the most common causes of the error and share with you the steps you can take to fix it.
Why iPhone Says "SIM Not Supported"

Understanding the underlying causes of the 'SIM not supported' error is where it all begins as this will determine the most appropriate solution. Here are the most common reasons for this issue:
Locked iPhone
One of the most common causes of the error is when your iPhone is locked to a specific carrier. This means that your device is tied to that network provider and may not accept SIM cards from other carriers.
If you purchased your iPhone from a carrier store and it is still under a contract or if for any other reason the network provider locked the device, you could run into this error.
Incompatible SIM Card
Using an incompatible SIM card can also trigger the error. Some SIM cards may not be compatible with certain iPhone models or network protocols. If you are using an older SIM card or one that is not supported by your iPhone's network protocols, you may find yourself battling this problem.
It's important to ensure that the SIM card you are using is compatible with your iPhone's network protocol.
Software Glitches
Software glitches can interfere with the proper recognition of your SIM card. Outdated software, incompatible iOS updates or corrupted settings can contribute to this error.
It's recommended that you keep your iPhone's software up to date to avoid compatibility issues. We'll see how to do that when exploring solutions to the problem.
Other Reasons
Other reasons for the error include:
- The SIM card is damaged or defective.
- The SIM card is not inserted correctly.
How to Fix "SIM Not Supported" Error
If you are getting the 'SIM not supported' error, there are a few basic things you should try first before diving into the more technical stuff:
- Check the SIM card for damage. There is no solution that will work if the SIM card is defective. If you notice or suspect that it is damaged, it is best that you get a new one.
- Make sure the SIM card is inserted correctly. Just like SIM card damage, nothing will resolve the 'SIM card not supported' error if the card is not correctly in its position. The SIM card should be inserted into its tray with the gold contacts facing down.
- Contact your carrier. If the carrier has locked the SIM card, they may not be too enthusiastic about unlocking it so you can use it with other carriers. Still, there is no harm in trying your luck. The worst they can do is say no.
If none of the above first-level solutions fix the error, then you should proceed to the more technical steps below.
#1 Unlock Your iPhone Using DirectUnlocks
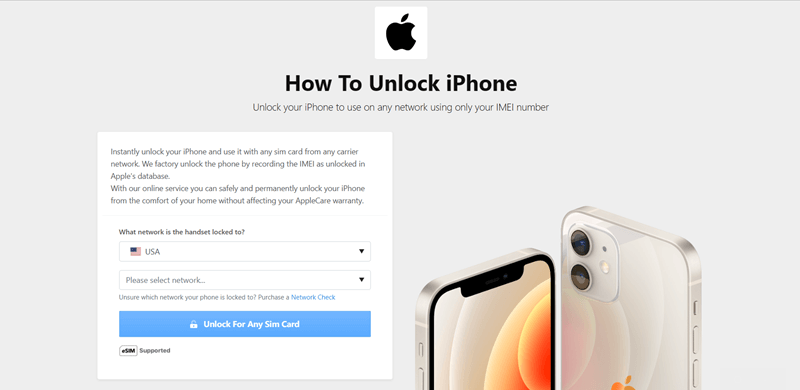
If your iPhone is locked to a specific carrier, you will need to unlock it before using a SIM card from another carrier. You can do this by contacting your carrier but that will not always get it to work. In which case, you may be better off reaching out to DirectUnlocks iPhone unlock service. DirectUnlocks is a reputable website that offers carrier unlock services for iPhones at an affordable fee.
To unlock your iPhone with DirectUnlocks, indicate your carrier, provide your device's IMEI number, pay a fee and wait for the unlocking process to complete in Apple's database. You will receive unlock confirmation via SMS and email.
Unlock Your iPhone Now!
By using DirectUnlocks, you will not affect your AppleCare warranty. Once your iPhone is successfully unlocked, restart it.
#2 Restart Your iPhone
'Restart your device' is a phrase that has made IT support staff the target of tech jokes and countless memes. But if something is such a go-to solution, that's probably because it works a lot of the time. Sometimes, a restart can resolve minor software glitches. If you are having trouble with your iPhone, restarting just might help.

To restart your iPhone on an iPhone X or later, press and hold the power button and a volume button until the 'slide to power off' option appears. Drag the slider and wait for your phone to turn off. After about 30 seconds, press and hold the power button again until the Apple logo appears on the screen.
To restart older iPhone models, press and hold the power button until the 'slide to power off' option appears. Drag the slider and wait for the phone to turn off. Wait 30 seconds then press and hold the power button until you see the Apple logo.
Once your iPhone restarts, check if the error is resolved.
#3 Reset Network Settings
Resetting your network settings including your APN settings can correct connectivity issues including problems with SIM card recognition. To reset your network settings, go to the Settings app on your iPhone, tap on 'General', click on 'Transfer or Reset iPhone' and then select 'Reset'. Next, choose 'Reset Network Settings'.

Note that this will remove all saved Wi-Fi networks, Bluetooth connections, APN settings and VPN settings. Resetting your network settings will however not erase any of your data. After the reset is complete, restart your iPhone and check if the error persists.
#4 Reset All Settings
Resetting all settings is a more drastic step than resetting your network settings but it can sometimes fix 'SIM not supported on iPhone' problems that resetting your network settings cannot. If the previous steps have not resolved the issue, you can try resetting all settings on your iPhone. This will not erase your data but will restore all settings to their default values including your network settings, app settings, wallpaper etc.
To reset all settings, navigate to the Settings app, tap on 'General', then 'Transfer or Reset iPhone', select 'Reset', and choose 'Reset All Settings'. Confirm the action, and your iPhone will reset the information. After the reset, check if the SIM card is now detected and supported.
#5 Update iOS
Outdated software can sometimes trigger problems with SIM card recognition. If you are using an outdated version of iOS, you may be able to fix the error by updating to the latest version. Updating iOS is a good way to keep your iPhone up to date with the latest security patches and bug fixes.

To ensure your iPhone's software is up to date, go to Settings, tap on 'General', and select 'Software Update'. If an update is available, tap on 'Download and Install' and follow the on-screen instructions to run it. After the update is complete, restart your iPhone and check if all is well.
#6 Factory Reset
Performing a factory reset is the last resort if you are unable to fix the 'SIM not supported' error using any of the other methods. It's crucial to note that a factory reset will erase all data and settings on your device. The complete data deletion that occurs with a factory reset cannot be undone.
So it's essential that you backup all your data before proceeding. Here are the four major ways to ensure your data is safe before a factory reset.
- iCloud - iCloud automatically backs up your iPhone data daily when your device is connected to power, locked and connected to Wi-Fi. You can also manually back up your iPhone data. To back up your iPhone data to iCloud, go to Settings > [your name] > iCloud > iCloud Backup and turn on iCloud Backup.
- iTunes - Connect your iPhone to your computer and open iTunes. Select your device and choose "Back Up Now" to create a local backup on your computer. You can encrypt the backup for added security.
- Third-Party Apps - Several third-party apps like Google Drive, Dropbox or OneDrive offer backup options. Install and configure these to automatically sync and store your iPhone data.
- External Storage - Connect an external hard drive or USB flash drive to your computer and copy the files manually.
With your backup complete, you can now run a factory reset. To perform a factory reset, go to the Settings app, tap on 'General', select 'Reset', and then choose 'Erase All Content and Settings'. Confirm the action, enter your passcode if prompted and wait for the process to complete. After the factory reset, set up your iPhone as a new device and check if your SIM card can now be detected.
Final Words
Encountering the 'SIM not supported' error on your iPhone can be frustrating. By following these detailed steps, you should be able to fix the error and enjoy the full functionality of your iPhone while using your preferred SIM card. Start by carrier unlock your iPhone using a service like DirectUnlocks. If the error persists, try restarting your device, resetting network settings, updating iOS or, as a last resort, performing a factory reset.
In case after doing all these you continue to experience the 'SIM not supported' error even, I would recommend that you contact Apple support or your network carrier for further assistance. I hope this article helps you fix the "SIM not supported" error on your iPhone. Please let me know if you have any other questions.